How to Use Tailwind Ghostwriter Blog Wizard (FAST AI Blogging Tool) [2024]
Disclosure: This post contains affiliate links, meaning that if you purchase something through the links below, I will receive a commission at no cost to you. Learn more.
TL;DR:
- Tailwind Ghostwriter Blog Wizard uses AI to turn your ideas into complete blog posts in just minutes.
- The easy 3-step process walks you through generating titles, outlines, and full articles.
- Monthly pricing plans give you Ghostwriter credits to create high-quality blog posts for as low as 25 cents each.
- While editing is still required, Ghostwriter delivers great AI-written content that saves hours of writing time.
Tailwind is widely recognized as having the most effective tools for scheduling content on Pinterest and Instagram; however, over the course of the past several years, the company has expanded its feature set to become one of the most comprehensive marketing platforms available.
With the recent rise in popularity of ChatGPT, Tailwind decided to get into the AI tool game with its own AI offering known as Ghostwriter.
Tailwind Ghostwriter is a suite of AI tools that can turn any content idea into reality in just a matter of minutes instead of the hours (or days) it normally takes.
In this post, I’m going to do a deep dive into my favorite tool in the Ghostwriter toolbox – The Blog Post Wizard.
What is Tailwind Ghostwriter Blog Wizard?
The tool’s name is pretty self-explanatory, but let’s talk about what the Blog Post Wizard does.
Tailwind’s Blog Post Wizard lets you input the topic of a potential blog post, and from that idea create a full publishable article.
The interface is intuitive, walking you through the steps one by one until the article is complete.
🏆 AI Writing Tool

Tailwind Ghostwriter is a cost-effective solution for marketers leveraging AI content. Sign up for FREE and get access to all of the Ghostwriter AI tools.
How Much Does Tailwind Ghostwriter Cost?
Tailwind Ghostwriter operates on a credit system, so your monthly credit allotment will depend on the Tailwind plan you are subscribed to.
The good news: Tailwind offers a free forever account which includes 10 Ghostwriter credits per month, so you can try out Ghostwriter before you commit to a paid plan
If you decide to subscribe to a paid Tailwind plan (pricing starts at $9.99 per month) you will get additional monthly credits:
- Pro Plan – 50 Ghostwriter credits
- Advanced Plan – 250 Ghostwriter credits (This is the plan I subscribe to)
- Max Plan – 500 Ghostwriter credits
But just how many credits do you need to write a full blog post with Tailwind Ghostwriter?
When you use Ghostwriter AI to generate a full blog post you are charged 1 credit for each step of the process.
There are 3 steps necessary to generate an article so you will use 3 credits for each blog post you write.
Keep in mind anytime you regenerate any text you will be charged an additional credit.
Here is roughly how many monthly blog posts you can generate with each plan:
- Free Forever Plan – 3 posts
- Pro Plan – 16 posts
- Advanced Plan – 83 posts
- Max Plan – 166 posts
So if you choose the Advanced Plan (like me), and pay annually ($19.95 per month) you can expect to pay around 25 cents per blog post.
I already swear by Tailwind’s best-in-class social media marketing tools to automate my Pinterest and Instagram accounts, so I feel like I’m essentially getting AI-written blog posts as a bonus!
How to Write a Blog Post with Tailwind Ghostwriter Blog Wizard
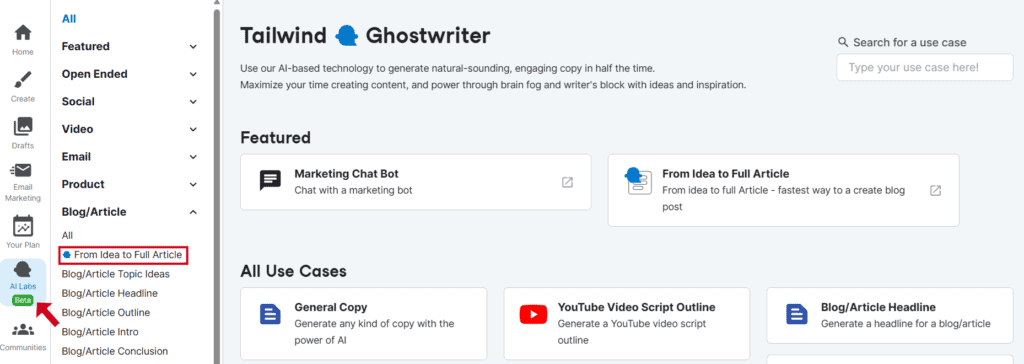
The first step in writing a blog post with the Blog Creation Wizard is to choose the From Idea to Full Article tool.
1. Generate Title Ideas
Next, you want to input the topic for your blog post and let the Ghostwriter AI generate some potential titles to use.
For this example, I’m going to be using Tailwind Blog Creation Wizard to help me write a blog post about “How to Create Clickable Pins for Pinterest”.
Click the Generate Titles button and Ghostwriter will give you a handful of titles.

You have the option to edit any of the titles and article summaries that are generated to your liking.
Once you are happy with the results, select the title and summary you want to use for your blog post.

Now that you have the perfect title for your post click the Continue to Outline button to move on to the next step.
2. Generate an Outline
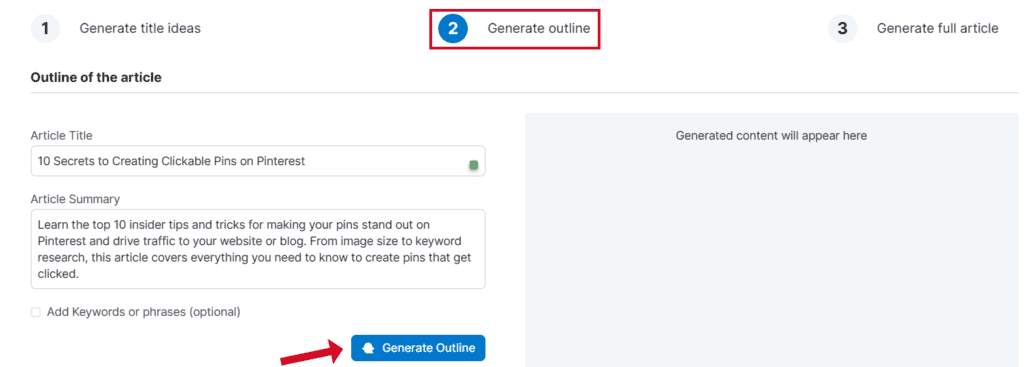
Before you have Tailwind Ghostwriter AI generate an outline for your blog post, you have another opportunity to edit your title and summary.
There is also the option to enter additional keywords and phrases to help guide the AI to generate an outline close to the topic of your blog post.
Once you are happy with your title, summary, and keywords click the blue Generate Outline button.
Ghostwriter will then use AI to generate sections of the blog post:
- Introduction
- Subheadings
- Conclusion
Introduction
A good introduction is essential in getting the reader excited about the content of the post.

From my experience with Ghostwriter’s AI, it does an excellent job of writing introductions that hook the reader to continue on.
Subheadings
Ghostwriter will next display a list of relevant subheadings that make up the bulk of the post’s content.

You have the option to add your own subheadings, alter existing ones, and rearrange them in any order you choose.
Conclusion
The conclusion is a vehicle to wrap up your blog post and encourage the reader to take action on what they learned.

Once you are happy with the conclusion click the Generate Full Article button and Ghostwriter AI will start generating your blog post.
3. Write a Full Blog Post
Ghostwriter AI usually takes a minute or two to generate a blog post and you can watch it being written in real time!
If you don’t like the post for whatever reason, just click the Re-Generate Article button (Note: You will be charged an additional credit each time you re-generate a post).

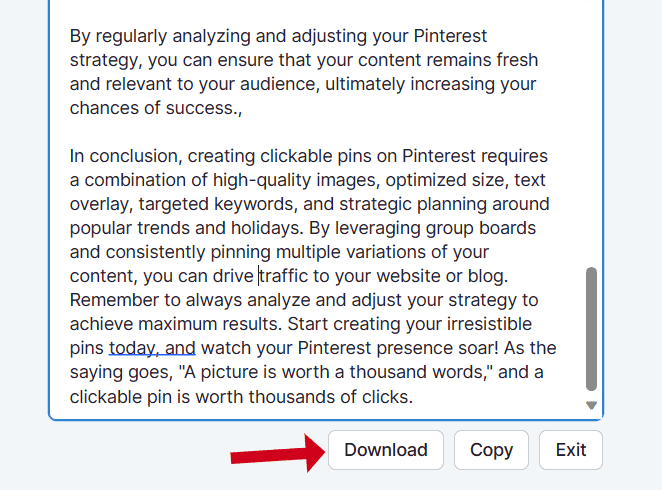
Once the post is written and you are happy with the overall outcome, you can choose to download the post as a .txt file or copy it to your clipboard.
Before you paste the post into WordPress or your favorite text editor (like Google Docs), it’s always best practice to make sure that the AI hasn’t plagiarized any existing content on the web.
I use a tool called Quetext to check all of my AI content for plagiarism.

For the example post I created with Ghostwriter AI, it came back with a 22% similarity score, which may seem kind of high until you manually check the potentially plagiarized phrases.
Upon closer evaluation, most of the problem sentences were just common phrases and word combinations being used. There was only one sentence that I felt needed to be completely reworded.
This is on par or slightly better than the results I get when scanning ChatGPT output for plagiarism.
Is Tailwind Ghostwriter Good for Writing Blog Posts?
So, now that you understand how to write a blog post using Tailwind Ghostwriter, you probably want to know if it is actually good for writing blog posts…
In my opinion, YES Tailwind Ghostwriter is great for writing blog posts!
As someone who regularly uses ChatGPT and OpenAI GPT-4 to write long-form blog posts, I was very impressed with the output from Tailwind Ghostwriter.
The most interesting thing I found is that Ghostwriter had no problem pumping out blog posts over 2k words (the blog post in this example is 2130 words).
If you are focused on generating blog posts that rank well on Google, I would suggest spending your time doing SEO keyword research and fine-tuning the subheadings Tailwind provides before you have Ghostwriter write a post.
As with all AI output I’ve tested from a variety of platforms, you will still need to do some moderate editing to the blog posts generated with Ghostwriter AI before hitting publish to your website.
Overall though, Tailwind Ghostwriter delivers amazing results for the money and offers a ton of input customization choices to help you quickly create the best article possible.
My Final Thoughts…
The Tailwind Ghostwriter Blog Wizard is a game-changing tool for content creators, making the blogging process faster, more efficient, and hassle-free.
By leveraging the power of artificial intelligence, this innovative platform enables users to create high-quality content in a matter of minutes.
With its user-friendly interface and powerful AI-driven features, the Tailwind Ghostwriter Blog Wizard is a must-have for bloggers and content creators looking to stay ahead in the ever-evolving digital landscape.
Don’t let writer’s block or lack of time hold you back any longer – give the Tailwind Ghostwriter Blog Wizard a try today and experience the future of AI-powered blogging.

